Needle, Nest, Petal: A First Ribbon Embroidery Sampler from Your Scrap Drawer
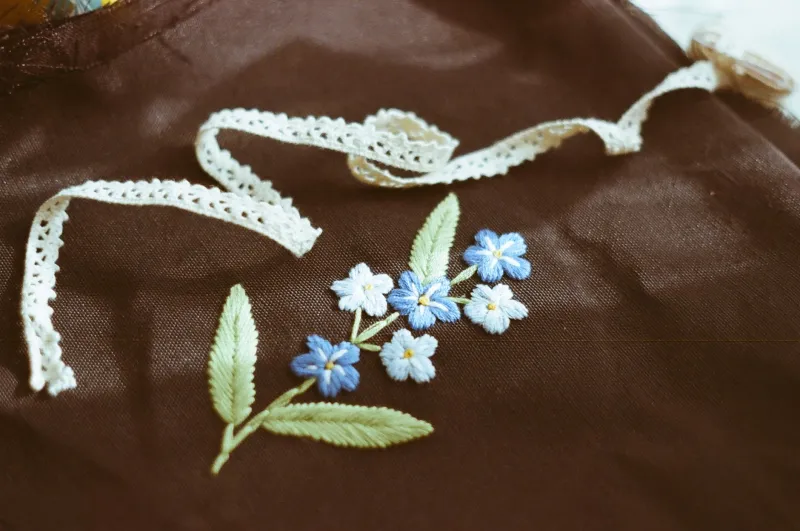
November is a funny month for crafters. The garden has gone quiet, the Christmas tin is already on the shelf, and there is that hour after dark when nobody wants to start anything ambitious. It is exactly the right sort of evening to thread a large-eyed needle with a scrap of 7mm satin and see what happens.
Ribbon embroidery has a reputation for being fussy and faintly Victorian, all silk roses on christening gowns. In practice it is one of the most forgiving hand crafts going. The stitches are big, the results arrive quickly, and a metre of ribbon goes a surprisingly long way. If you have a drawer of part-used rolls from last December, you already have a kit.
The ribbon that behaves (and the ribbon that will not)
The single biggest reason beginners give up is the wrong ribbon. Silk ribbon is the traditional choice and it is genuinely lovely — soft, fluid, and it takes a fold beautifully — but it is also pricey and can mark if you unpick it twice. Polyester satin is the practical stand-in: slightly stiffer, holds a loop well, and costs pennies per metre.
A sensible starting set is 4mm satin for small flowers and knots, 7mm satin for the classic woven rose, and 13mm for leaves and bolder stems. Organza works if you want something sheer and light, though it can fray, so seal the cut ends with a quick pass of a lighter flame held well away. Leave the following on the shelf for now: wired ribbon (the wire fights every stitch), heavy glitter-edged ribbon (it shreds needles and tempers), and anything wider than about 15mm, which is really for wrapping rather than stitching.
Length matters too. Cut 30–40cm at a time. Anything longer will twist, knot and fray before you have finished a single leaf — a mistake nearly everyone makes once.
The kit that actually matters
You need less than the books suggest. A chenille or tapestry needle in a size 18 to 22 will do most of the work; the large eye matters far more than the sharpness. For denim and other tight weaves, swap to a sharp embroidery needle so you are not forcing the ribbon through. A small hoop, sharp embroidery scissors, and a fine marker for placing motifs complete the set.
Fabric choice is where beginners often trip. Linen, cotton duck, quilting cotton doubled up, felt and denim all hold ribbon well. Anything slippery or very loosely woven will let the stitches sag. A lightweight iron-on interfacing behind a thin cotton is a cheap fix that saves a whole evening of swearing.
Four stitches that cover almost everything
Learn these and you can make a whole hedgerow.
The woven rose. Draw a small five-spoke star, bring the ribbon up at the centre, then weave over and under each spoke in turn, keeping the ribbon flat rather than twisted. Ease it gently as you go and the spokes will disappear into a rounded petal swirl. Two or three of these in decreasing sizes reads as a proper cluster.
The loop stitch. Essentially lazy daisy with ribbon. Bring the needle up, form a loop, take it back down close to where it emerged, and anchor the tip with a tiny straight stitch over the loop. That anchor is the whole trick — without it the petal flops.
The straight leaf. A simple straight stitch from base to tip, but bring the ribbon up flat and lay it down without twisting. Vary the angle and length and you have leaves, lavender spikes, fir twigs.
The French knot. Wrap the ribbon around the needle once or twice — no more — and hold the wrap steady as you pull through. These become berries, seed heads, and the centre of any flower that needs one.
Where it tends to go wrong
Tension is the usual culprit. Ribbon wants to sit on the surface of the fabric, not be dragged into it; if your petals look flat and sad, you are pulling too hard. Anchor the starting end at the back with a couple of small stitches through the ribbon tail rather than a knot, and finish the same way.
Overcrowding is the second. Leave space between motifs and the fabric breathing room around them — a small, well-spaced spray always looks more confident than a dense clump. Do not iron finished work flat, either. Press it face down on a folded towel and let the steam do the work.
Your autumn-to-Christmas sampler
Here is a small project that earns its keep across the season. Take a 20cm square of natural linen, pop it in a hoop, and treat it as a slow sampler rather than a race.
In late October, stitch a loose spray of leaves in rust, ochre and moss — straight leaves at varying angles, a few French knot seed heads, one small woven rose in a faded terracotta. Leave the top right of the square empty.
Through November, add a couple of deep berry knots and a thin gold stem or two in 4mm ribbon. It will look slightly unfinished, which is fine.
Come December, fill that gap: two holly leaves in 13mm forest green, three red berries, and a tiny ribbon bow stitched down at the base. The whole piece then reads as a year turning, from hedgerow to hearth, and it takes perhaps three evenings in total.
Put it on something
Cards are the quickest win — back a small piece of cotton with iron-on interfacing, stitch straight through it without a hoop, then mount it onto card blank with double-sided tape. Cushion covers work beautifully if you keep the stitching to one corner and wash cool. Denim is the most forgiving of all: a jacket pocket or a knee patch, with a scrap of interfacing behind the fabric so the stitches do not pull through.
Start with the four stitches, one hoop and the odds and ends already in your drawer. By the time the fairy lights go up, you will have something worth giving.